In the previous blog, we explored the fundamentals of Power Query and why it's an essential tool for data preparation. Now it's time to focus on the practical transformations you'll rely on most to clean, organize, and prepare data for analysis. If you work with data long enough, you'll notice the same handful of moves come up again and again no matter whether the source is a clunky export from a legacy system, a monthly CSV from a vendor, or a live connection to a SQL database. Power Query Transformation engine built into Excel and Power BI, was designed around exactly this pattern: a short list of everyday transformations that do most of the heavy lifting.
This guide breaks down the transformations you'll reach for constantly, explains what each one actually does, where to find it, and when to use it finishing with a compact cheat sheet you can keep open while you work.
Why this matters
Every transformation you apply in Power Query is recorded as a named, repeatable step. Get the core five right promote headers, change type, filter rows, remove duplicates, and split/merge columns and your query will clean new data automatically every time you hit refresh.
1. Promote Headers
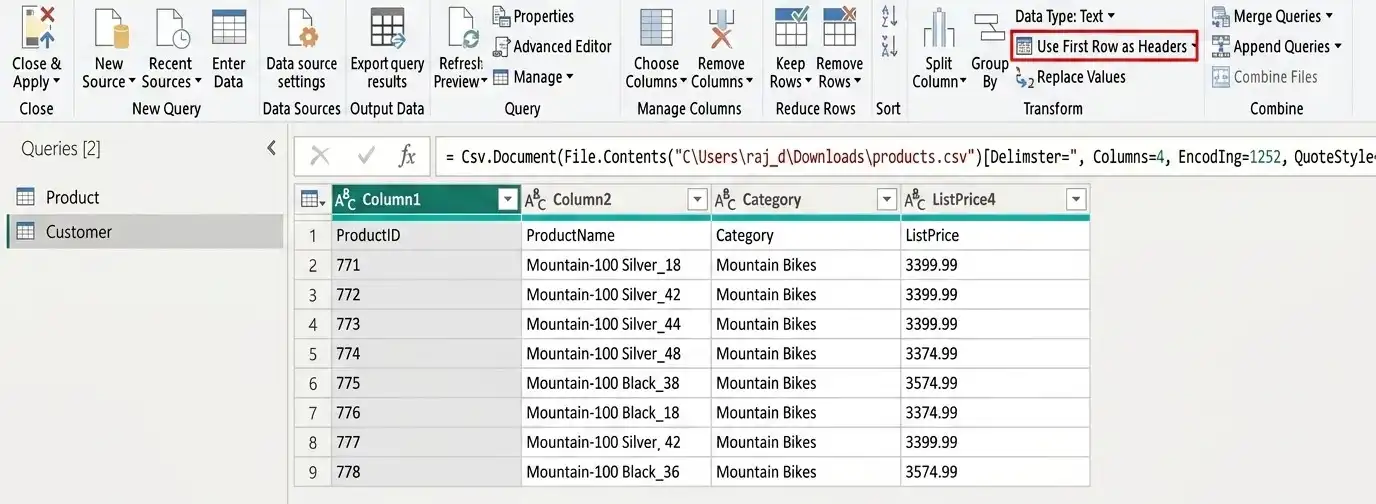
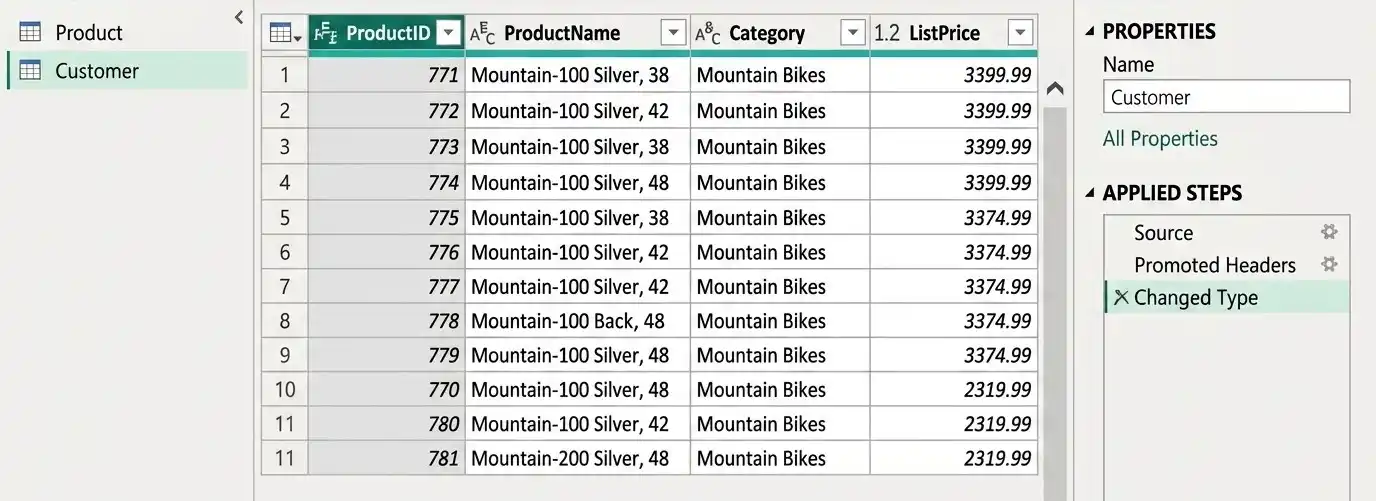
Data doesn't always arrive with clean column names. Exports from older systems, web tables, and CSV files often load with generic labels like “Column1,” “Column2,” while the real header sits in the first row of data. Promoting headers fixes that in one click.
How to do it:
- Go to Home → Use First Row as Headers.
- Power Query moves row 1 into the column titles and shifts the rest of the data up.
- If headers are buried further down (for example, after a title row), remove the extra rows first, then promote.
2. Change Data Types
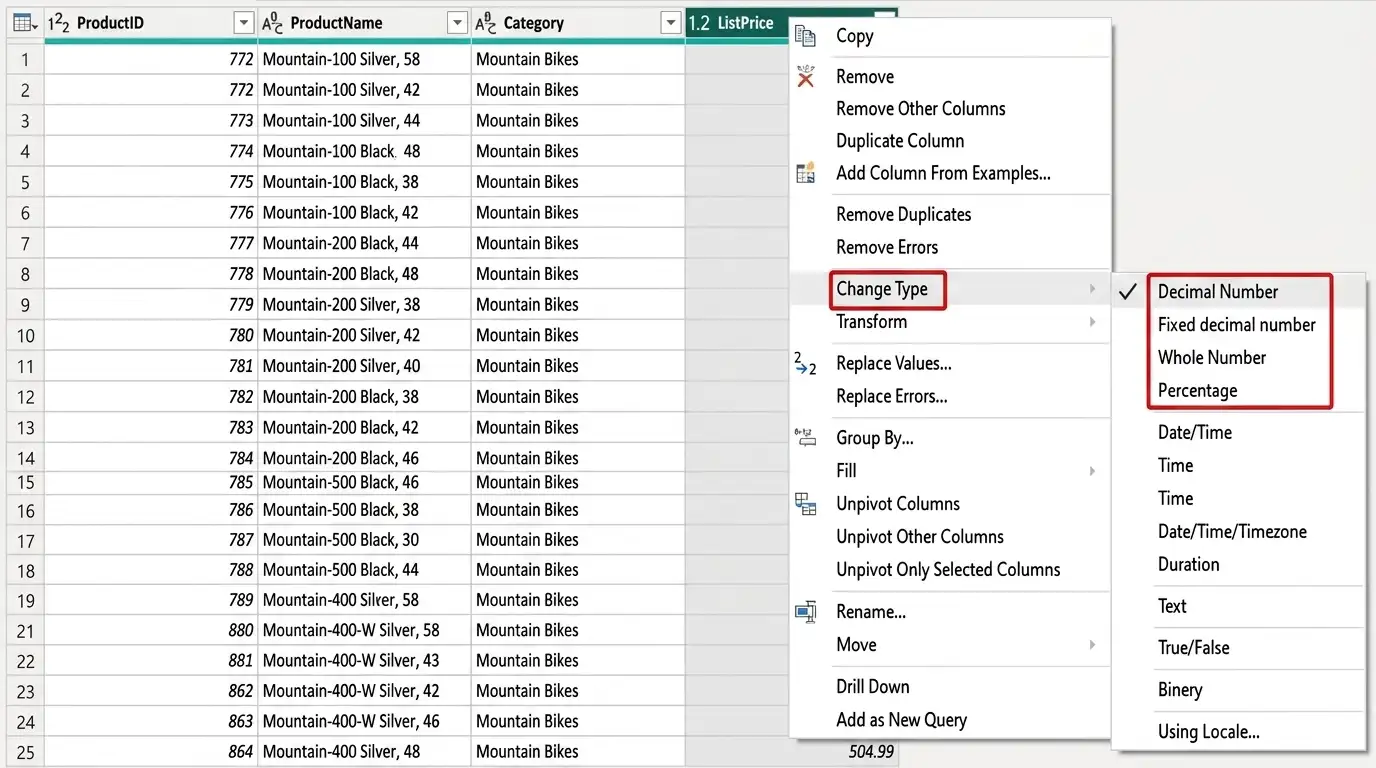
Every column in Power Query has a data type text, whole number, decimal, date, or boolean and getting this right matters more than it looks. Correct types are what let dates sort chronologically, numbers sum correctly, and relationships join cleanly in Power BI.
How to do it:
- Click the type of icon in the column header or use Home → Data Type.
- Do this early right after import so downstream steps operate on correctly typed data.
- Watch locale settings: a date or number format that looks right in one region can misread in another.
3. Filter Rows
Filtering trims your dataset down to the rows that actually matter active customers only, the last 12 months, non-blank entries, or values above a threshold. Because it reduces the amount of data flowing through every later step, it's often best applied early in the query.
How to do it:
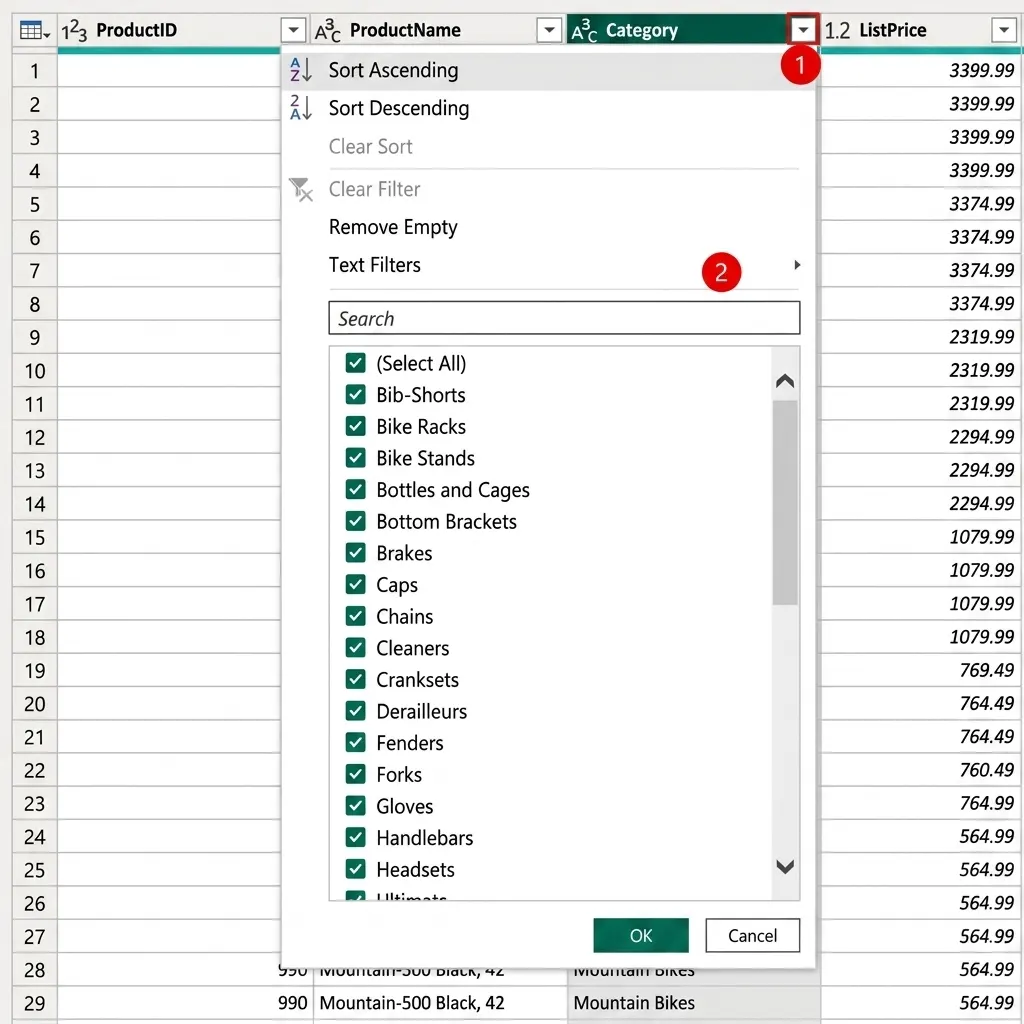
- Click the dropdown arrow on any column header, similar to an Excel AutoFilter.
- Choose a value-based filter or a condition (contains, greater than, between dates, and so on).
- Combine multiple filter steps to build up precise, layered conditions.
4. Remove Duplicates
Repeated records a customer logged twice, a transaction pulled in by two overlapping exports quietly inflate totals and skew averages. Removing duplicates keeps only unique rows based on the column or columns you choose.
How to do it:
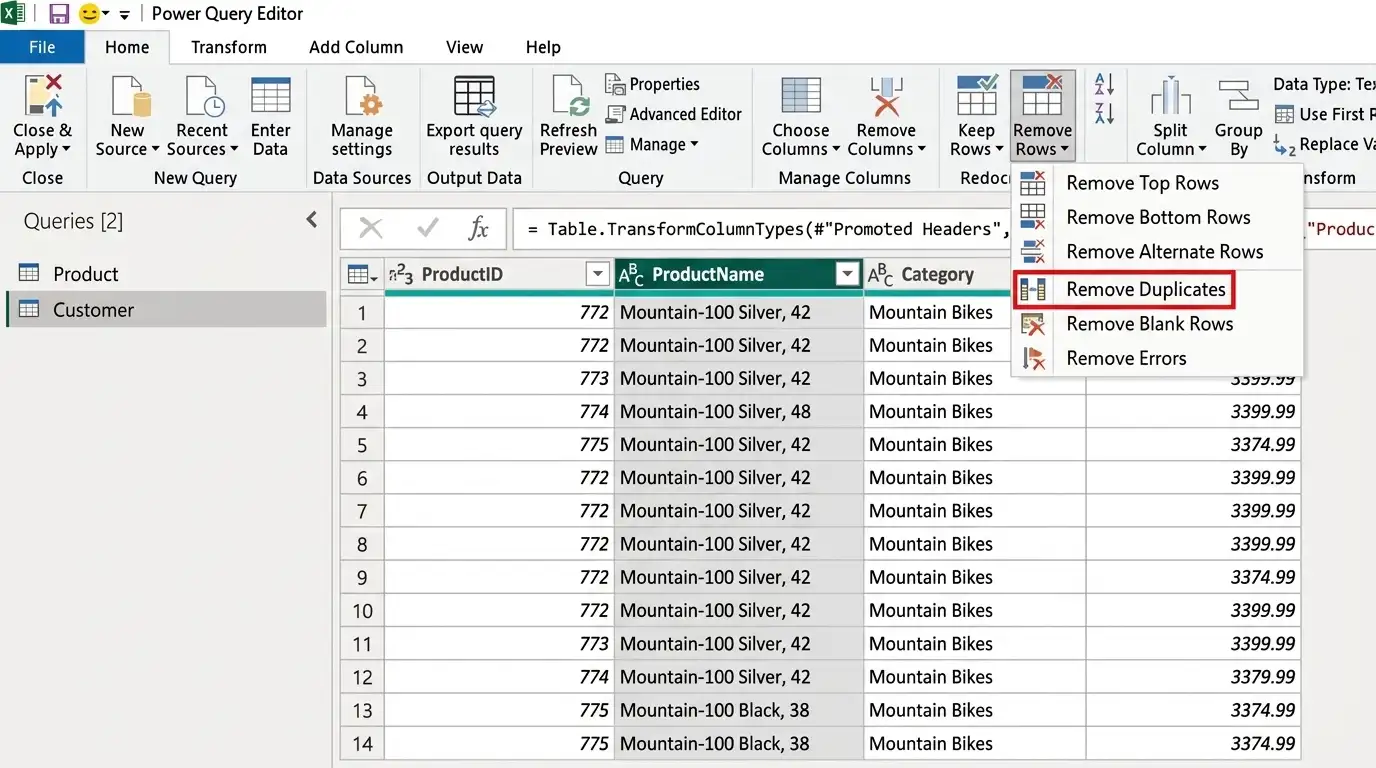
- Select the column (or columns) that define a unique record, such as an ID field.
- Go to Home → Remove Rows → Remove Duplicates.
- Be selective about which columns you check — comparing on too many columns can miss duplicates that differ only in a minor field.
5. Split and Merge Columns
Real-world fields are rarely shaped the way you need them. A “Full Name” column needs to become “First Name” and “Last Name.” A “City, State” field needs splitting on the comma. On the flip side, sometimes two columns need to become one combining “First Name” and “Last Name” back into a single display field.
Split: how to do it:
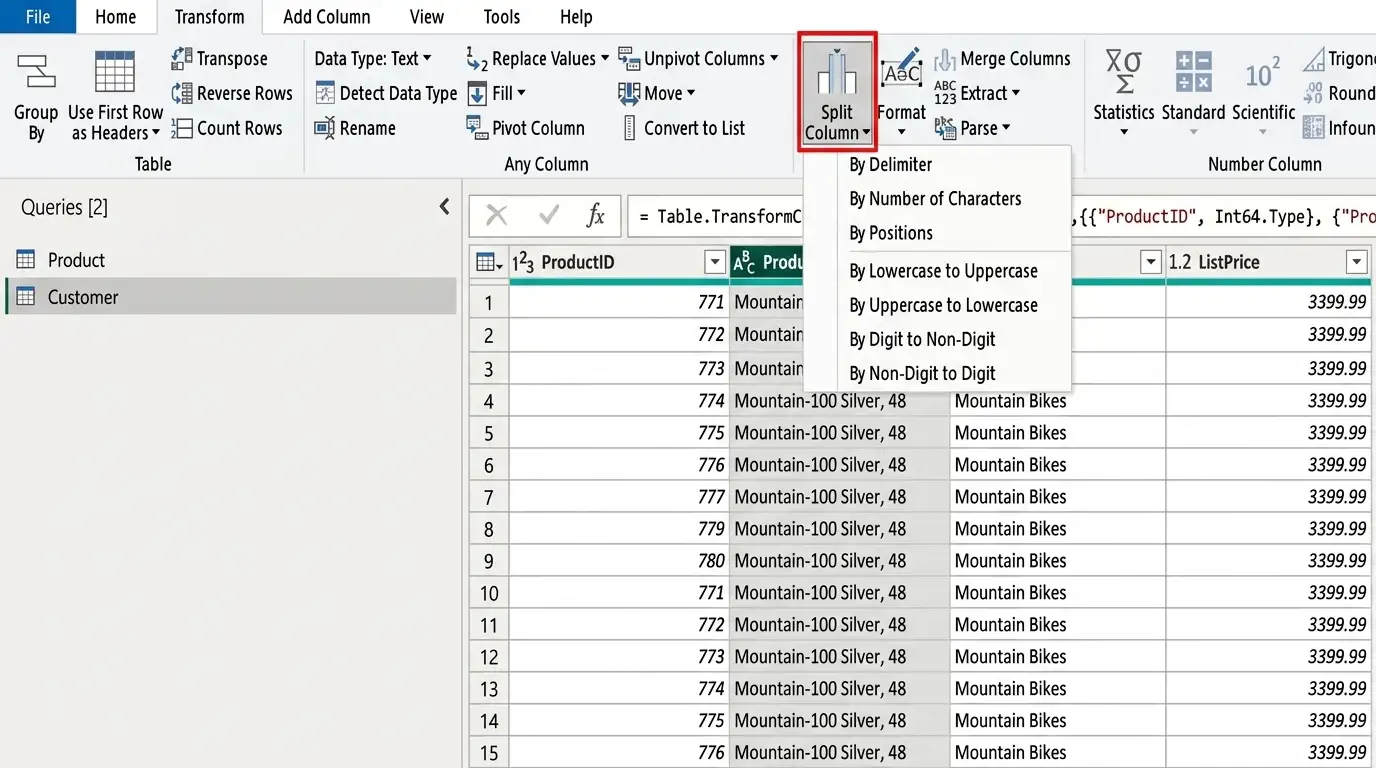
- Select the column, then go to Transform → Split Column.
- Choose By Delimiter, By Number of Characters, or By Positions depending on the pattern in your data.
Merge: how to do it:
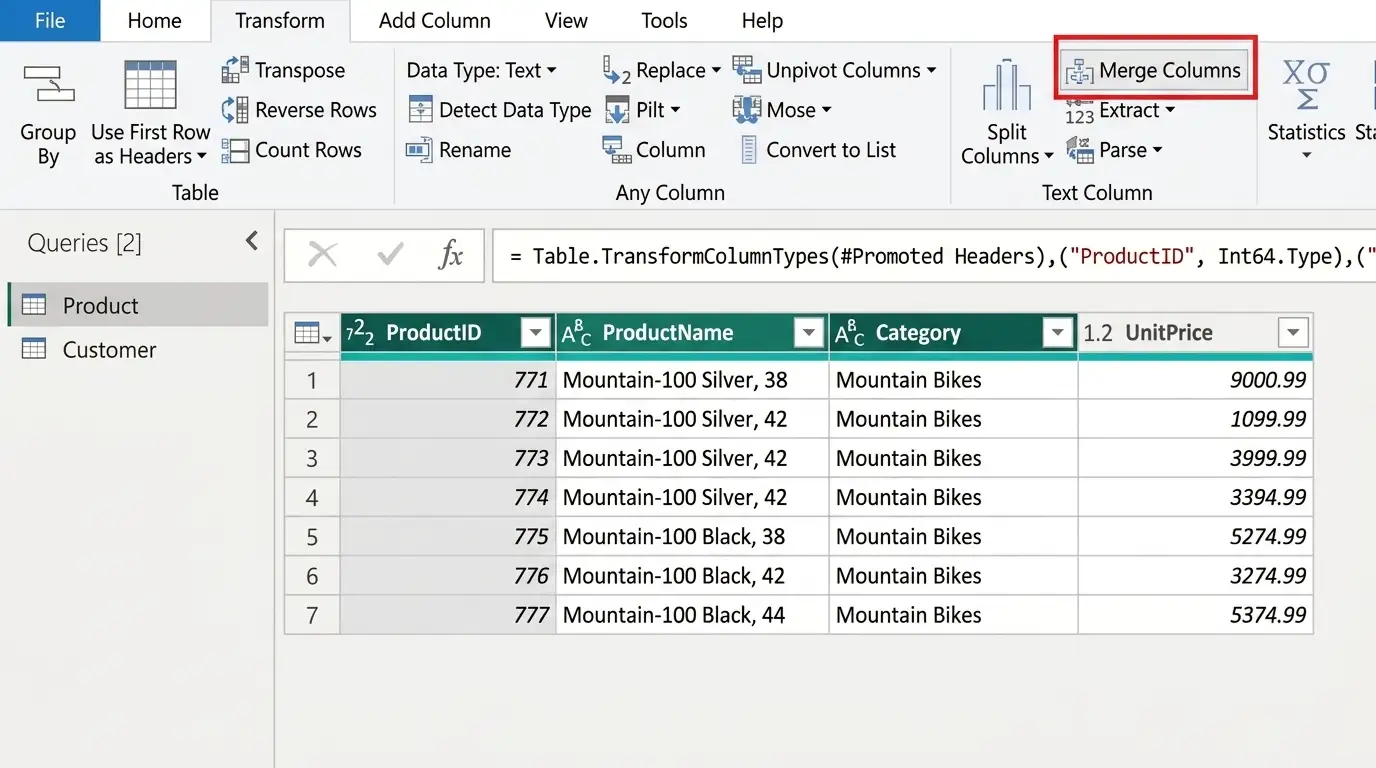
- Select two or more columns (Ctrl+click for multiple).
- Go to Transform → Merge Columns and choose a separator space, comma, dash, or a custom character.
The Quick-Reference Cheat Sheet
Keep this table nearby while you work it's the fastest way to remember what each transformation does and where to find it.
| Transformation | What It Does | Where to Find It | Use It When... |
| Promote Headers | Turns the first data row into proper column names | Home → Use First Row as Headers | Your data was imported without column titles |
| Change Data Type | Sets each column as text, whole number, decimal, date, or boolean | Column header icon, or Home → Data Type | Right after import — correct types drive accurate calculations and joins |
| Filter Rows | Keeps or removes rows based on a condition | Column header dropdown, or Home → Remove Rows | You only need a subset — active customers, last 12 months, non-blank entries |
| Remove Duplicates | Keeps only unique rows based on selected column(s) | Select column(s) → Home → Remove Rows → Remove Duplicates | The same record appears more than once and is skewing totals |
| Split Columns | Breaks one column into several, by delimiter, position, or character count | Transform → Split Column | A field like “Full Name” or “City, State” needs to become separate columns |
| Merge Columns | Combines two or more columns into one, with an optional separator | Select columns → Transform → Merge Columns | You need a single combined field, like “First + Last Name” |
Everything so far has been interface tour and theory. This is the “prove you can do something” checkpoint a small, complete win before the concepts get heavier in later posts.
Conclusion
Power Query rewards repetition more than memorization. The first time you promote headers, retype a column, or split a name field, it's a deliberate click through a menu. By the tenth time, it's muscle memory and that's exactly the point. These five transformations show up in nearly every project, and once they're second nature, you'll spend far less time wrestling with messy data and far more time analyzing it.
Bookmark the cheat sheet above, and the next time a file lands in your inbox looking nothing like the format you need, you'll know exactly which four or five steps will get it there.